Ladies’ Lunch

In recent years, my mom and some of her good childhood friends have gotten together for a ladies’ lunch with all daughters, mothers, aunts, and sisters invited, too.  And absolutely no boys allowed.  It would be rude to invite them anyway because we have to talk about them.  Or at least the ladies want to hear from the daughters about any boyfriends on the scene.

photo 1

Although we got together for lunch, Glenda, this year’s host, had prepared quite a delicious feast: baked ham, green beans and potatoes, candied fried apples, butternut squash, cranberry sauce and rolls.  It was positively scrumptious and beautiful.  Glenda had set the table with lovely pieces of china and vintage dishes.

photo 4

Served alongside the food were lots of great stories about growing up together and how much the small town has changed.  There was quite a discussion about how hitch-hiking was no big deal back in the day, the new art gallery in town, and big personalities that everybody knew and loved.

photo 2 copy 2

And, in true southern fashion, there were just as many desserts as there were dishes for the main meal.  Among them were jam cake with both dough icing (my favorite) and caramel icing (my mom’s favorite), chocolate cake, bourbon balls, coconuts balls, peanut brittle, cookies and more.

photo 2 copy 2

I love my mom’s face in this picture.  I think she was saying, “Don’t be eying that caramel iced jam cake, lady.”  Just kidding. I think.

photo 3 copy 2

We shared lots of laughs over good memories.  There were some really good ones, but if I told you about them I’d have to kill you.  Or at least I might not be invited back to ladies lunch.

Y’all come back,

Sugarlump

Thanksgiving Trials and Tribulations: The Meal

On Thanksgiving morning, I got up at 6 AM to get my 20lb turkey, Tyrone, into the oven.  He had been brining in the garage for the previous 24 hours to ensure his flavorful tenderness.  After several careful calculations, I heaved him up and out of his brining container and into the sink.

IMG_6337

There is just nothing appetizing about a raw turkey.  Especially a raw turkey taking a bath in your kitchen sink.  FYI that’s a lemon from the brine, not a rubber ducky.

IMG_6341

06:30: Judging by the mess, there was some serious cooking underway at this point.

IMG_6344

Here I am mentally preparing myself to lift Tyron and escort him to the tanning bed.

IMG_6347

A few last words. Bye bye, birdy.

IMG_6348

Next on the list was to make the desserts and eat my breakfast since it was likely only about 7:00 AM at this point.  Please note my “Oops! All Berries!”, the traditional thanksgiving breakfast cereal. As I noshed on my nutritious meal, I made brandy apple cake and derby pie.  Technically, it was bourbon apple cake because I didn’t have any brandy and bourbon seems to make most things taste better.  This wasn’t the last of the bourbon for the day, either.

IMG_6376

My mom had gotten me this beautiful cake pan that was featured on the cover of Southern Living a year or so ago.  I was anxious to see how cleanly the cake would come out of the pan and nervous that it might tear.

IMG_6382

But it slid right out and looked lovely!

IMG_6381

The pie looked good, but I overcooked it.  While the taste was alright, the pie was so sticky that it stuck to my teeth like tar.  This is why I make multiple desserts…with bourbon.

09:00: Princess Eugene arose around this time.

IMG_6378

Meanwhile, I continued to baste Tyrone every 30 minutes or so.  The previous owner of the home designed a lovely chef’s kitchen but only put in one oven.   Have you ever cooked Thanksgiving dinner in one oven and in one day?  Trying to juggle a 20lb turkey, a cake, a pie, dressing, sweet potatoes, roasted nuts, and popovers meant that Tyrone’s legs were a little underdone.

I promptly started measuring for an additional oven.

IMG_6391

Looking golden, Tyrone!

About this time, I was roasting some pecans for the salad.  Eugene walked in and asked if I was making popcorn.  I gave her a very confused look and then ran to the oven to pull out my nuts that were so far past roasted that they were as black as night and beginning to melt into the pan.  I took the pan outside and left it on the patio to get rid of the lovely smell.  When I went to get the pan the next day, the nuts had been left untouched.  They were even too far gone for the squirrels.

IMG_6410

Ahhhhhhhhhhh!

At this point we had used every piece of cutlery in the kitchen.  That is not an exaggeration.  Things got especially tight when it was time for dessert.

IMG_6413

My collection of serving utensils is lacking.  And by lacking I mean nearly nonexistent.

As my mom finished up the gravy, she asked what I would like to put it in.  In my imaginary gravy boat, of course!  I scrambled for something suitable and came up with this silver nut bowl that was Aunt Anna’s.  I think the soup ladle 4 times its size really completed the look.

IMG_6416

Though we had a few challenges along the way, we managed to produce a nice meal.  It was tasty, but not as spectacular as we had wanted so we started to make a plan for next year.  Here’s a sneak peak at the menu:  (If you’d like to come, please bring your own tailgating equipment.)

  • Fried corn! How did we forget this!!??? This is a thanksgiving staple
  • Roasted asparagus
  • Dressing patties
  • Root vegetable gratin
  • Bourbon bread pudding
  • Maybe just a turkey leg?

We’ll try to have the additional oven installed by then.  Maybe we’ll have a proper table and chairs, maybe not.

Merry Christmas Eve!

Y’all keep it tasty,

Sugarlump

Chicken Pot Pie

I’m back on a food network kick and it seems everyone is making chicken pot pie these days.  This dish has never held much appeal for me but the more I watched Barefoot Contessa, The Pioneer Woman and Trisha Yearwood prepare it, the more I wanted to make it.  It just seems like a hug in a dish.  A highly-caloric hug.

I reviewed a couple of recipes and made up a hybrid of sorts.  I pulled out some chicken breasts from the freezer, an onion, the remaining celery from some lentils I had made early in the week, white wine, half and half, and some butter.  I needed only a couple of things from the store: fresh thyme, carrots, chicken bouillon cubes and refrigerated pie dough.  I didn’t make my own crust because I couldn’t stand to think about all of the shortening and butter atop this already cream-based dish and I didn’t feel like pulling out and cleaning my 49lb food processor.   If I don’t have to measure out the fat, it doesn’t exist as far as I’m concerned.

Now, as I was thinking about making this dish, I realized that I didn’t have any ramekins or personal-sized soufflé dishes.  I decided to swing by the home section at Marshalls to see if they had anything inexpensive.  All they had were miniature Le Crueset square baking dishes in red.  While they were reasonably priced, I have mustard-colored Le Crueset and my OCD self would not let me purchase a non-matching color.

I headed over to Big Lots.  On my way into the store, I caught a renegade shopping cart that started careening down the parking lot and towards an unassuming parked vehicle.  I stopped the cart about a foot shy of a big old dent in the side of this car.  As I neared the door to the store, a man waiting in a truck rolled down his window and yelled, “Nice save!”  For my good Samaritan efforts, I thought maybe the baking dish gods would reward me by having the right ramekins in this store.  Nope.  At least I worked off a few calories in the high-speed cart chase.

I recalled Kroger had a nice selection of well-priced baking pans and dishes so I ran in there quickly.  Sold out in the size I needed.  Of course!  I was about to bite the bullet and hit up William Sonoma when I remembered Pier 1.  They had just the thing at just the right price.  Success!

photo(8)

I primarily used The Pioneer Woman’s recipe from her first cookbook, substituting half and half for heavy cream and fresh thyme for dried.  I also added in peas because they’re cute and tasty and a little cayenne pepper for a kick.  I was pleased with the result but I might consider adding a little bit of dry mustard next time or perhaps some curry powder.  I might also consider a smaller ramekin next time because I feel like I just ate a rock.  Back to Pier 1!

photo(9)

I did use some smaller disposable pans so I could stick the rest of the recipe in the freezer. Aren’t they precious?

photo(11)

Y’all eat up,

Sugarlump

photo(10)

P.S. I sprinkled these dough scraps with cinnamon and sugar and put them in the oven to bake with my pot pie.  It was a sweet little snack!

It’s kind of not so great…

I recently purchased Gwyneth Paltrow’s new book, “It’s All Good,” intrigued by the idea of healthier and cleaner eating.  The book offers a lot of great information and recipes about eating diary-free and gluten-free.  It also discusses healthier choices for fats and non-meat proteins.  As someone with a sensitive stomach, I thought I might try out some of these ideas with my meals.  Don’t get me wrong though, you won’t catch me eating tofu lettuce wraps any time soon/ever.  Except that one time I made them for dinner at my parents’ house.  I tried hard to sell them to my dad as a delightfully healthy alternative to beef tacos and he just wasn’t buying it.  And neither was I.  So I decided to apply my new way of thinking about eating to a fairly familiar food: pizza.

I headed to Dominos one evening a few weeks back.  I went in and ordered a medium gluten-free pizza thinking that was the smallest size.

Dominos guy: “Oh we only have the gluten-free in a small.”

Me: “Ok perfect.  How much will that be?”

Dominos guy: “11.99?”

Me: “Wow that seems expensive for a small…”

Dominos guy: “Well you can get a medium for 7.99!”

Me: “I thought you said the gluten-free crust only came in a small.”

Dominos guy: “Well it’s not really gluten free.”

Me: “What do you mean? Your gluten-free crust isn’t really gluten-free?”

Dominos guy: “Well if you ordered a medium it wouldn’t be.  The medium is a better deal unless you need the gluten-free for health reasons.”

(DUH?  Why else would I order gluten-free?)

Me: “I’ll take the small gluten-free, please.”

Verdict: The pizza was pretty terrible and expensive.  I think I’ll stick to the real stuff and just eat it infrequently.

My next venture was speckled lima beans.  I must admit that I usually make these with bacon grease and on this occasion I fully intended to make them that way; however, there was no bacon or bacon grease to be found in my refrigerator.  Having carefully studied all of the critical pantry items for a dairy-free and gluten-free household, I had thought it was worthwhile to purchase a TUB of coconut oil at the wholesale club.  Never mind that I only cook a few nights per week, I hate coconut, and I am the only one in the household that will be using the coconut oil.  The 54oz tub was just the ticket.

photo(6)

Seeing the tub of coconut oil sitting on the counter, I decided to throw a few healthy spoonfuls in as my fat for the beans.

Boy was that a misstep.

I thought it would be a subtle taste, but no.

I threw in a halved onion and 2 cloves of garlic to try to mitigate the undesirable coconut flavor.  It helped, but the coconut was still there in a big bad way.  Bacon grease and coconut oil are not similar flavor profiles in case you were wondering.

Verdict:  Good thing you can use this stuff as moisturizer.  I’ll be smelling pretty tropical for the next 23.4 years or however long it takes me to saturate my skin with that tub of coconut oil.

Having failed miserably with savory options, I thought I might have better luck with something sweet.

Nope.

I found this recipe that sounded great for a gluten-free fudgy chocolate cake.  How bad could that be?

BAD.

IMG_5574

It looked so pretty, but underneath that icing lay a very strange tangy, cleaning solution-like aftertaste and a chewy texture much like an actual dish sponge (not to be confused with the lovely texture of sponge-cake).

It nearly ruined chocolate cake for me.

In an effort to stay positive and salvage the situation, I have been scraping off the naturally gluten-free chocolate icing and eating it by the spoonful.  I now have a scalped cake in my refrigerator.

Verdict:  There’s a reason people bake with wheat flour.

I’m hungry.

Y’all come back,

Sugarlump

Tackling Tiramisu

There are very few non-chocolate desserts that I will give the time of day.  My absolute favorite non-chocolate dessert is butterscotch brownies, which continue to baffle me with their non-chocolaty deliciousness.  There are some things that cannot be rationally explained and I believe this is one of them.  Next on my list of acceptable non-chocolate desserts is tiramisu, but only a handful that I have tasted in my life are up to snuff.  One absolute deal-breaker is any trace of almond.  In my opinion, it does not belong in tiramisu.

I tried to make tiramisu once before in my life.  It was not a success.  I went a little overboard on the coffee and put in about twice what the recipe called for because those lady fingers just didn’t look saturated enough as I was assembling the dessert.  The next day, my tiramisu was sitting in a puddle.  The taste wasn’t bad, but I definitely had a texture issue to work out.  Unfortunately, I had volunteered to make this dessert because my mom’s boss and his family were coming over for dinner.  They were sports and cleaned their plates.   It was on that fateful day that I learned firsthand the valuable lesson that one should never prepare an unfamiliar dish for the first time when company is coming over, particularly company you would like to remain in good standing with.  Instead, I would highly recommend preparing something that you have perfected.

My mother did not get fired in case you were wondering.

Since my tiramisu had knocked me down instead of picking me up, it was a while before I was emotionally ready to tackle it again.  My neighbor Anna is Italian and a wonderful cook and baker, so I decided it was safe to try to make tiramisu again with her.

I only allowed myself to measure the dry ingredients and did not deviate from the recipe in the slightest.

For the most part.

When Anna and I were discussing the ingredients for the dessert, I offered to pick up the lady fingers.  She informed me that that would not be necessary as we would be making the cake portion ourselves because it would be a better texture and flavor.  Boy was she right on about that.

This recipe is a long one, but it’s not difficult.  It originates from Southern Living magazine, circa 1988. Heregoes:

IMG_5077

Preheat the oven to 400 degrees and line a half-sheet pan with wax paper and then butter and flour the wax paper so the cake does not stick.

IMG_5078

Separate 4 eggs and let them come to room temperature.

IMG_5079

Melt 3 tablespoons of butter and let it cool.

IMG_5081

Brew some potent coffee and put 1 cup of it aside to cool. (I would recommend drinking the rest of it if you’re sleepy because this is going to take a while.)  Add ¼ cup of sugar and a miniature of Kahlua to the coffee.

IMG_5082

Sift together 1 cup of all-purpose flour, ¼ teaspoon of baking powder, and ¼ teaspoon of salt.

IMG_5083

In another bowl, beat together the egg yolks and ¾ cup of sugar until light and thick.  This will take about 5 minutes so I would recommend stretching beforehand if using a handheld mixer.

IMG_5085

It will look something like this when it’s ready.

IMG_5090

Then pour in 1 tablespoon of lemon juice, 1 tablespoon of water, and 1 teaspoon of ‘niller extract.

IMG_5091

I love vanilla extract.

IMG_5093

I also really like this nifty little gadget that allows one to dust cocoa powder on things.

Sorry, I got sidetracked by the idea of something chocolate.

IMG_5094

In yet another bowl, beat the egg whites on low speed until they are frothy and then add in ¼ cup of sugar.  Increase the speed of the mixer to medium and beat the egg whites until they are stiff but don’t overbeat.

IMG_5097

Add half of the egg white mixture and half of the flour mixture to the egg yolk mixture.  Fold the mixtures together until combined.  Repeat with the remaining half of the mixtures.

IMG_5099

Pour the batter onto the sheet pan.

IMG_5104

Spread the batter evenly across the sheet pan using a spatula.

IMG_5108

Then pop it in the oven for 15 or 20 minutes or until golden brown on top and the center springs back.

IMG_5109

Let it cool for a few minutes in the pan and then turn it out onto wax paper and let it cool completely.

IMG_5110

Carefully remove the wax paper from the bottom of the cake as that is not a texture you want in your tiramisu.

IMG_5112

Then, cut off the edges of the sponge cake so no one has to experience a crunchy/stiff bite of tiramisu. Remember, it’s all about texture.

IMG_5114

For the filling, beat 1 cup of heavy cream until it forms peaks.

IMG_5115

Then beat together ½ cup sugar and 1 pound of mascarpone cheese.

IMG_5119

Fold together the mascarpone mixture and the heavy cream.  If you’re feeling rebellious, add a few drops of vanilla extract into the mixture.  In my experience, a little extra vanilla extract never hurt anything.

It was Anna’s idea.

IMG_5120

Next, cut the cake in half and place one half on a serving dish.

IMG_5122

Brush half of the coffee mixture onto the cake using a pastry brush.

IMG_5123

It should look something like this.

IMG_5124

Dust the cake generously with cocoa powder.

IMG_5126

Then sprinkle on some chocolate shavings.

IMG_5127

Spread half of the filling mixture over the first layer of cake.

IMG_5129

Easier said than done. Don’t be alarmed if some of the chocolate shavings get mixed in.  No one will ever know and it will still taste good.

IMG_5130

Repeat this process with the second layer of cake and filling.

IMG_5132

Coffee mixture…

Cocoa powder and chocolate shavings.

Filling…

IMG_5136

Some more cocoa powder…

IMG_5138

Smooth the sides with a knife.

IMG_5140

Decorate the top with dark and white chocolate shavings.

Then let the cake sit overnight in the refrigerator and enjoy the next day (preferably not with your mom’s boss unless this is at least the second time you’re making this recipe).

Here are the recipe cards:

IMG_5143

IMG_5142

IMG_5141

IMG_5144

(We deviated from the recipe a little bit by adding Kahlua instead of sherry or Marsala.  Don’t tell anyone.)

Y’all hurry back,

Sugarlump

Christmas Traditions

This year marked a big transition in tradition for the Dyer household.   Instead of having our family Christmas at my parents’ house as we have always done, I hosted here in my new hometown of Nashville.

In my one bedroom apartment.

I didn’t foresee an issue as I have a large sectional that can sleep two people so I knew all four of us would have a comfortable place to sleep.

What I didn’t foresee was the blanket shortage.  I wound up sleeping under my robe.

It’s ok though.  Santa still showed up and we had our family Christmas.

IMG_4919

I may need a bigger place if I plan on hosting regularly.

After our family Christmas on Christmas Eve morning with just me, Eugene and my mom and dad, we headed to Kentucky for Christmas on Christmas Day with the extended family.

Got that straight?

We always sleep at my dad’s parents’ house on Christmas Eve.  My aunt, uncle and cousins live just down the road so they do their family Christmas early in the morning and then head to my grandparents for the big family Christmas on Christmas Day.

Christmas morning, Granny made sausage gravy and biscuits.  Man that stuff is good.  I certainly couldn’t eat it every day but then again my great grandparents did and they lived into their 90’s so maybe there’s something to that.  I’ll have to ponder that at a later time when I’m feeling less full.

IMG_4930

Per tradition, we started with our stockings.  Among other lovely items, there was a Starbucks gift card, which it looks like I could have used that morning if the nearest Starbucks weren’t over 70 miles away.

IMG_4940

After the stockings, we moved into the living room and the youngins passed out the gifts.  Eugene found a tagless gift, which was cause for great concern.

IMG_4948

My mom and Aunt Vickie received some money in shot glasses from Santa (Papa).  I found this hilarious.  I’m glad Aunt Vickie thought so, too.

IMG_4945

Granny got her box of tide with a dollar bill from Papa.  He’s been doing this for decades and I’m still not really sure how it started.  Maybe someday I’ll get to the bottom of it.

After Christmas at my dad’s parents’ house, we headed down the road (literally) for Christmas with my mom’s parents.

I went straight for a bourbon ball….or two.   I have a wicked sweet tooth and there’s no telling when it will strike.

We settled into the living room and opened our gifts.  It wasn’t the same without my aunt, uncle and cousin on my mom’s side, but we were certainly thinking of them and wishing they could have been with us.

IMG_4960

After seeing the photo that my parents sent out unsupervised in the family Christmas card this year where I look possessed, Eugene and I insisted that we supply suitable photographs for next year’s card.  We had my dad take about 437 photos and this was one of the better ones.

photo(3)

With cameras retired for the day, we ate the delicious Christmas dinner that Grandmother had prepared for us.

Then I had a few more bourbon balls and a piece of rum cake.

scrabble

We played a game of Scrabble, one of our favorites.  I wasn’t on top of my game.  There’s only so much you can do when dealt X, B, J, H, L, L, T.  That, and most of the blood in my body was likely trying to aid in the digestion of the forty pounds of food I had eaten in the past few hours instead of pumping through my brain for a stroke of vocabulary genius.

And then I might have had another bourbon ball.

And then some leftover dressing from Christmas Eve dinner back at Granny and Papa’s.

And a piece of the jam cake cousin Lauren and I made on Thanksgiving and let ripen for Christmas.  It was scrumptious.

I think I’ll be full until next year.

bourbon

These things are the devil.

Y’all be careful,

Sugarlump

Chicken Enchiladas

Anyone who knows me well knows that I could eat Mexican food for every meal.  This preference stems all the way back to a childhood of begging to go to Taco Bell or to make tacos at home as often as possible.  As I’ve gotten older, my Mexican palette has expanded from crunchy tacos with meat and sour cream ONLY to guacamole, enchiladas, Mole and fish tacos.  I can make a mean taco, but I decided it was time for me to tackle homemade enchiladas.

I’ve looked at lots of recipes and watched various celebrity chefs make them on TV. I’ve taken note of the components of enchiladas at my favorite Mexican spots and I concluded the following as I developed my recipe:

1)      The enchiladas must be chicken enchiladas.

2)      The chicken must be shredded so as to absorb the delicious sauce and flavor.

3)      The tortillas must be corn tortillas.  This is critical not just for taste, but also for texture.

4)      No cumin allowed.  I don’t know why, but I just don’t care for this flavor.

5)      Spicy is better, just not so spicy that you can’t feel your mouth.

6)      Cream cheese is an excellent addition to the sauce inside and on top of the enchiladas.  It adds a touch of richness, balances the heat of the hot peppers, and it’s a little bit tangy.  Nobody wants an enchilada lacking in flavor and cream cheese won’t let you down.

7)      The tortillas must be soft in order to roll them.  I prefer not to dunk them in a bunch of hot oil (the best way to keep them from splitting and to hold their shape) so I microwave them between a few damp paper towels.  Not so authentic, but it means I can eat enchiladas more often, which is the ultimate goal here.

Now that we’ve covered those details, I’m hungry.  Let’s make some chicken enchiladas.

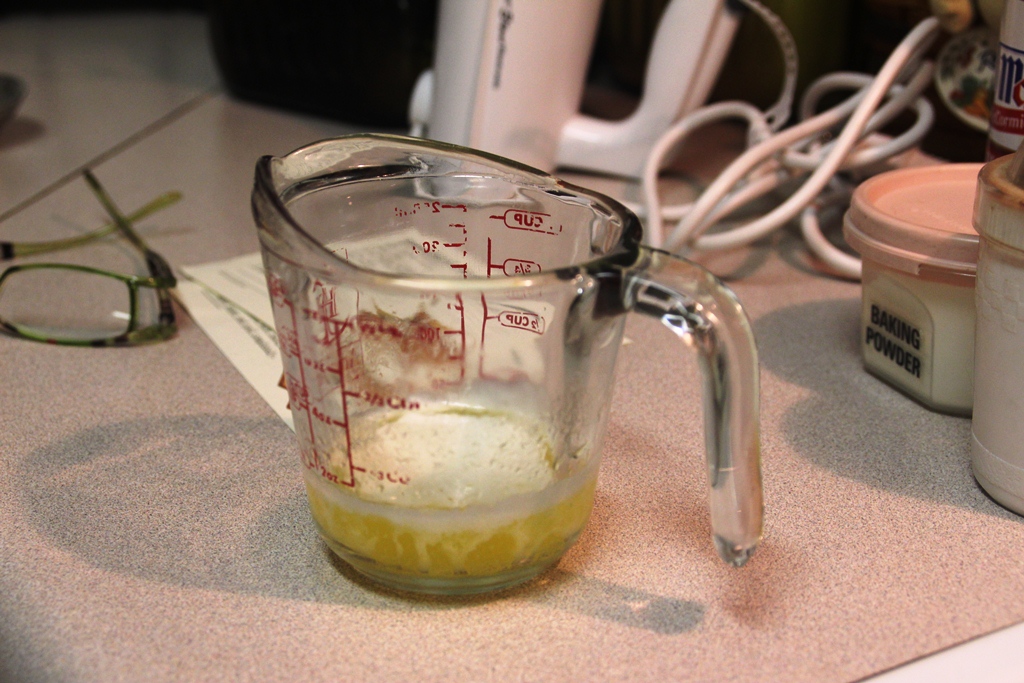
These ingredients will soon be combined in nothing short of deliciousness.  Don’t forget the tomato paste like I did in this picture.  It’s a critical player.

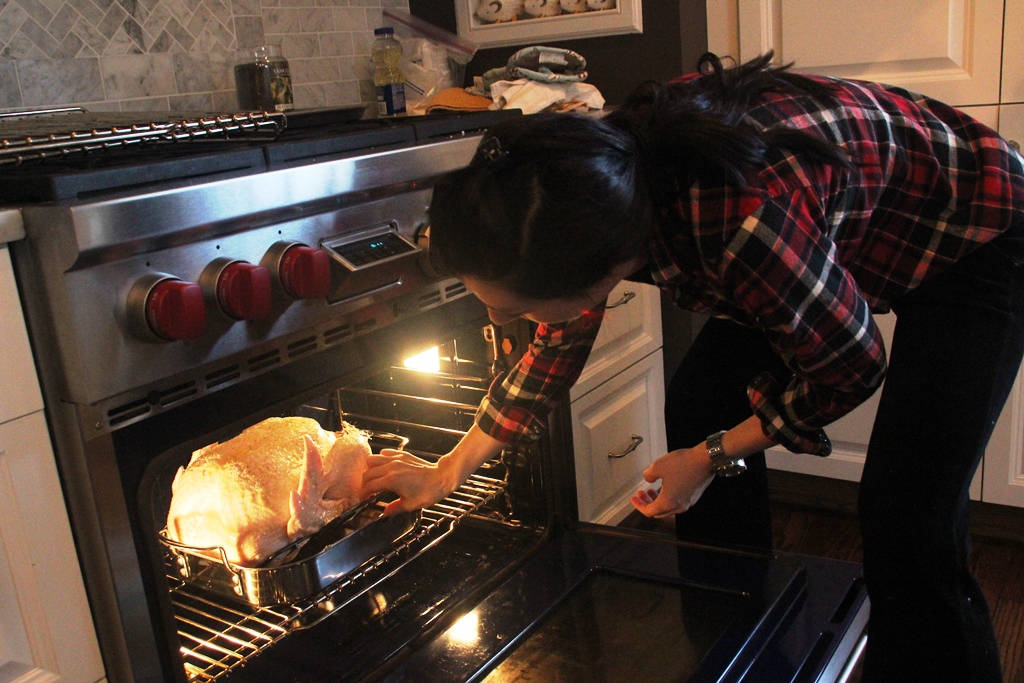
Preheat the oven to 400 degrees.  Rub a boneless, skinless chicken breast with olive oil.

Sprinkle both sides with chili powder, paprika, season salt, and garlic salt.  Bake for 20-25 minutes or until cooked through.

After it’s done, allow the chicken to cool for a few minutes.

Then, using your best tools (your clean hands) shred the chicken.

Chop up onion, garlic and jalapeno, seeds and all.  Please try not to touch your face until you’ve thoroughly washed your hands or you will be very sorry.  I speak from experience.

Sauté onion in olive oil over medium heat until translucent.

Then throw in the garlic and half of the jalapeno, allowing them to soften for about 30 seconds.

Sprinkle in the rest of the chili powder, paprika and season salt.

Drop in half of the cream cheese.

Pour in half of the chicken broth.

Plop in the tomato paste.

Stir all of that deliciousness together until combined.

Throw in the shredded chicken.

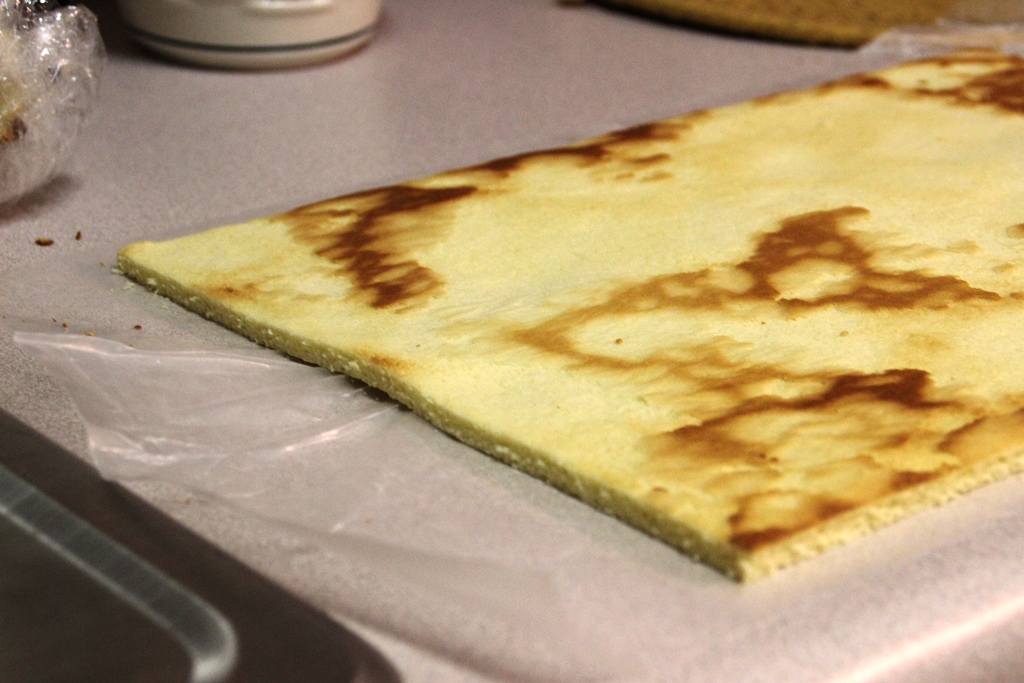
Let everything hang out together until the sauce has reduced a bit.  It should be thick and absorbed into the chicken.  It shouldn’t be too loose or assembling the enchiladas will be a disaster.

Once reduced, remove the chicken from the skillet and set it aside.

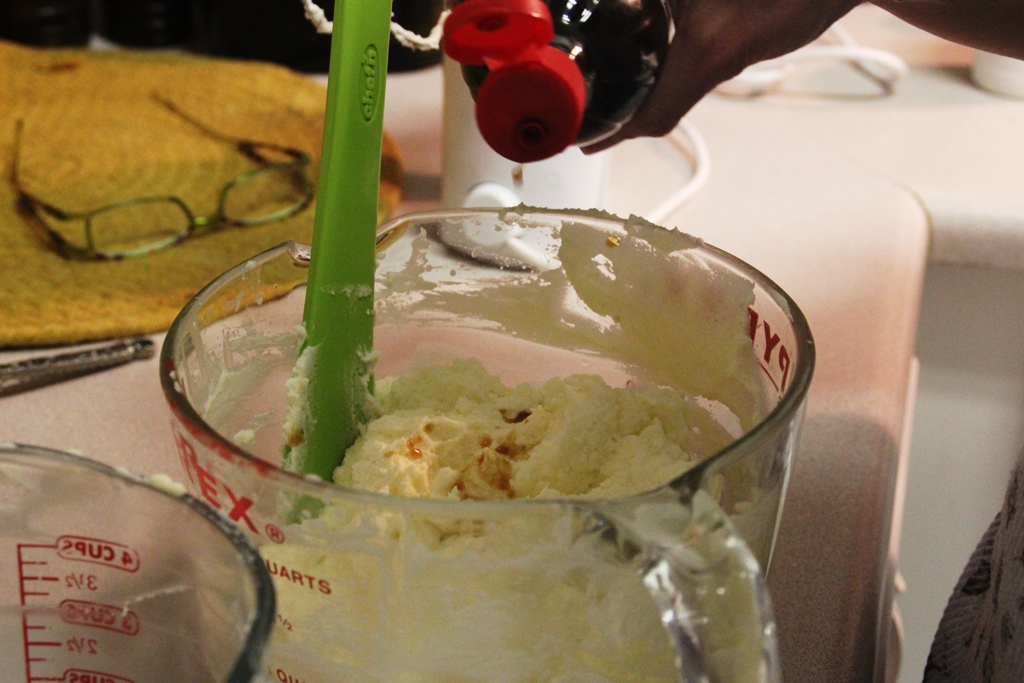
Then be lazy like me and throw the rest of the cream cheese into the same skillet.  This will actually catch some of that good flavor left in the skillet.  Laziness or genius? Most likely both.

Add in the remaining chicken broth and jalapenos.

Mix everything together and reduce until slightly thickened.

Microwave the stack of tortillas in damp paper towels for a minute or so on low power to soften them.

Then start assembling by placing 1/8 of the chicken mixture in each tortilla, rolling them up and placing them in the baking dish as you go.

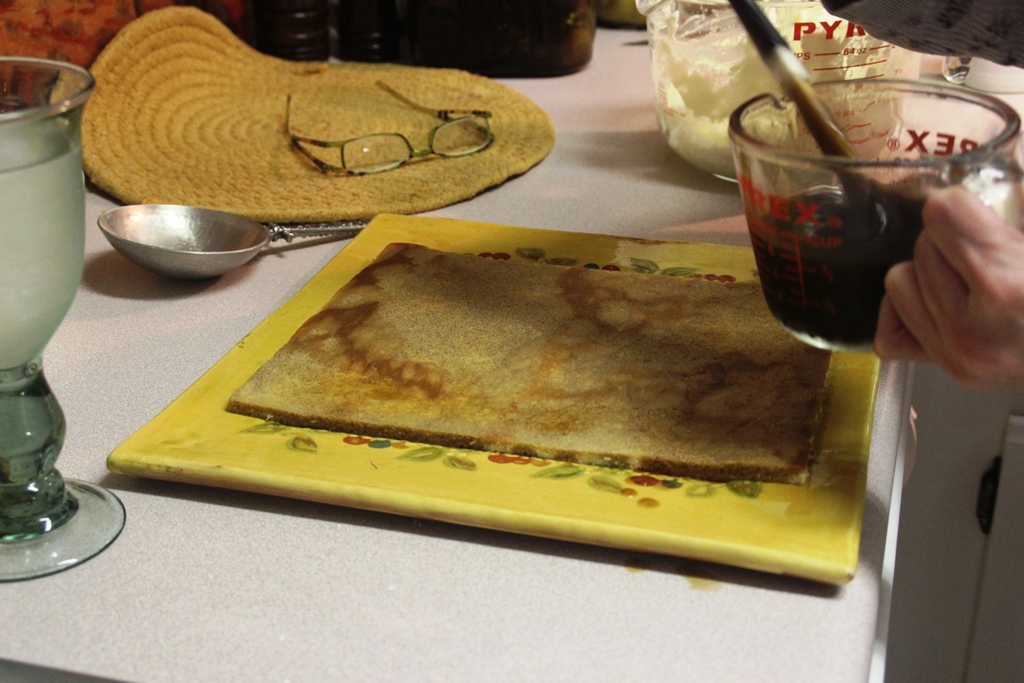
I didn’t do the best job preventing these from tearing slightly.  Oh well.  Nothing a little bit of sauce and cheese can’t cover up.

Then cover the top of the enchiladas with the cream cheese sauce.

And then top ‘er off with the shredded cheese and bake the enchiladas for 15-20 minutes on 300 until the cheese melts.

Here is the final product.  Enjoy!

Y’all come back and visit,

Sugarlump

Ingredients:

  • 1 large boneless, skinless chicken breast
  • 2 tbsp Olive oil
  • 2 tsp chili powder
  • 1 tsp paprika
  • ½ tsp season salt
  • ¼ tsp garlic salt
  • 1 small onion, diced
  • 3 cloves garlic, minced
  • 1 jalapeno, minced
  • 2 tbsp tomato paste
  • 2 cup chicken broth
  • Approximately 2/3 package of cream cheese
  • 8 small corn tortillas
  • ½ cup shredded cheese

1)      Cover chicken breast in 1 tbsp olive oil and then season with 1 tsp chili powder, ½ tsp paprika, ¼ tsp season salt and ¼ tsp garlic salt.  Bake at 400 degrees on a baking sheet for 20-25 minutes or until cooked through.  Let cool and then shred chicken.

2)      Sauté onion in 1 tbsp of olive oil until translucent over medium heat.  Add in garlic and ½ of the jalapeno, cooking for approximately 30 seconds before adding remaining chili powder, paprika, and season salt.  Add in 1/2 of chicken broth, the tomato paste, and 1/2 of cream cheese.  Mix together until combined.

3)      Add shredded chicken to mixture and allow to reduce until most liquid is absorbed.   Set aside in a separate bowl

4)      Using the same skillet, add remaining cream cheese, chicken broth and jalapeno pepper, whisking together until incorporated.  Let thicken.

5)      Wrap stacked tortillas in damp paper towels and heat in microwave until soft.

6)      Assemble tortillas, placing them in a baking dish.  Once all tortillas are assembled, cover them with cream cheese sauce and shredded cheese.

7)      Bake at 300 degrees for 15-20 minutes or until cheese is melted.

Sweet Tooth

I have a serious sweet tooth.  Actually, I like sweets so much that I would say I have sweet teeth.  I think I have 4.  Sweet teeth that is.  Not 4 teeth.  I have a lot more than 4 teeth in case you were getting the wrong idea.  However, if I continue to eat so many sweets, my teeth may start to fall out and I may someday have only 4 teeth.  But let’s not think about that.

I have no idea where I got my sweet tooth.  It might have to do with the fact that there are a lot of excellent, and I mean top-notch, bakers in my family.   As you can see, I served as designated bowl-licker as a toddler.  I’ve excelled in this role over the years.

I was often quite involved in the baking process so it was only natural that I wanted to enjoy the fruits of my labor.

I was very adventurous in trying new sweets, like Papa’s ice cream Popsicle.

My grandparents made the mistake of building cabinets accessible to toddlers.  If you couldn’t find me, I was likely in the cabinet, foraging for cookies.

I sure love me some sweets.  I also, however, really like savory food.  I guess what it boils down to is that I just don’t like bland food.  Can you blame me?

Y’all come back,

Sugarlump

Peanut Butter Chocolate Chip Cookies

I once had a peanut butter chocolate chip cookie at a local restaurant in the town I grew up in.

It changed my life forever.

After that day, it became my mission to perfect a peanut butter chocolate chip cookie recipe.

It took many a flop for me to get to where I am today.  I tried several recipes I found online and none was peanut-buttery enough.  So I tinkered with this and that and I think I’ve got a good thing going.   The trick is to put in A LOT of peanut butter.  Shocking, I know.  Also, take the cookies out of the oven before they look done.  I mean it. If you leave them in there until they look done, they will turn into bricks.  And no one likes to eat peanut butter chocolate chip bricks.

If you want to become instantly popular among your younger sister’s high school pals, I would suggest making these cookies.  After I made the cookies for the youngsters the first time, I was hit up for a double batch almost every time they came over.  I nearly broke my mixer once when I received a triple batch request.

There were never any cookies left by the time Eugene’s friends went home.

Here’s how to become instantly popular among your sister’s friends:

Assemble butter, peanut butter, sugar, light brown sugar, eggs, all-purpose flour, baking soda, baking powder, salt, and chocolate chips but NOT vanilla extract.  I don’t know what that was doing there.

Ingredients (recap):

1)      1 stick of unsalted butter, softened

2)      ¾ cup of peanut butter

3)      1/3 cup of light brown sugar

4)      2/3 cup of sugar

5)      1 egg

6)      1 ¼ cup all-purpose flour

7)      ½ teaspoon baking powder

8)      ½ teaspoon baking soda

9)      ¼ teaspoon salt

10)   1 cup chocolate chips (preferably 60% bittersweet)

Directions:

Preheat oven to 375 degrees.

Measure out the first 4 ingredients and throw them into a mixing bowl.

I would highly recommend spraying your measuring cup with cooking spray to help that peanut butter slide right into the bowl.  Keep a spatula handy in case the peanut butter gets pesky.

Cream the butter, peanut butter and white and brown sugars until light in color.

Add the egg and mix until incorporated.

Sift together flour, baking powder, baking soda and salt.  Add dry mixture to wet mixture and mix until just combined.

Stir in chocolate chips by hand.  I would have taken a picture but I was stirring.

Drop the dough onto a baking sheet using a large spring-loaded cookie/ice-cream scoop for even cookies.  Press down to flatten the cookies to ¾” thick.  The cookies should be about 3″ in diameter.  If you only have a medium size cookie/ice-cream scoop like the one pictured above, your cookies will be about 2″ in diameter.    Press any straggler dough into the sides of the cookies so they look prettier and more uniform when they come out of the oven.

Bake for 8-12 minutes (depending on your scoop size) or until just barely starting to brown.  The cookies will look underdone.  Let the cookies cool for 5 minutes on baking sheet and then serve or finish cooling them on wire rack.

I tidied up the edges of the dough for the cookies on the left and neglected to do so for the batch on the right.  The ones on the left are much more attractive.   However, I over-baked the cookies on the left and the ones on the right were just right.  You really have the watch these suckers.  The MOMENT you see just a hint of brown on the cookies, remove them from the oven to cool IMMEDIATELY.

I mean it.

You’ll thank me.

Y’all eat up,

Sugarlump

Things I Never Tire Of

Things of which I never tire:

1)      Sunsets

2)      Laughter

3)      Shoes

4)      Floor plans

5)      Chocolate

6)      Family and close friends

7)      Mystery

8)      Sitting on a porch

9)      The unconditional love of my little furballs

10)   Mexican food

In an ideal moment, I would be sitting on a porch of a home I designed the floor plan of, with family and friends, furballs at my feet, eating Mexican food followed by something chocolate, while laughing in a fabulous pair of shoes, pondering the great mystery that is life, as the sun sets.


Y’all keep it real,

Sugarlump