Thanksgiving Trials and Tribulations: The Meal

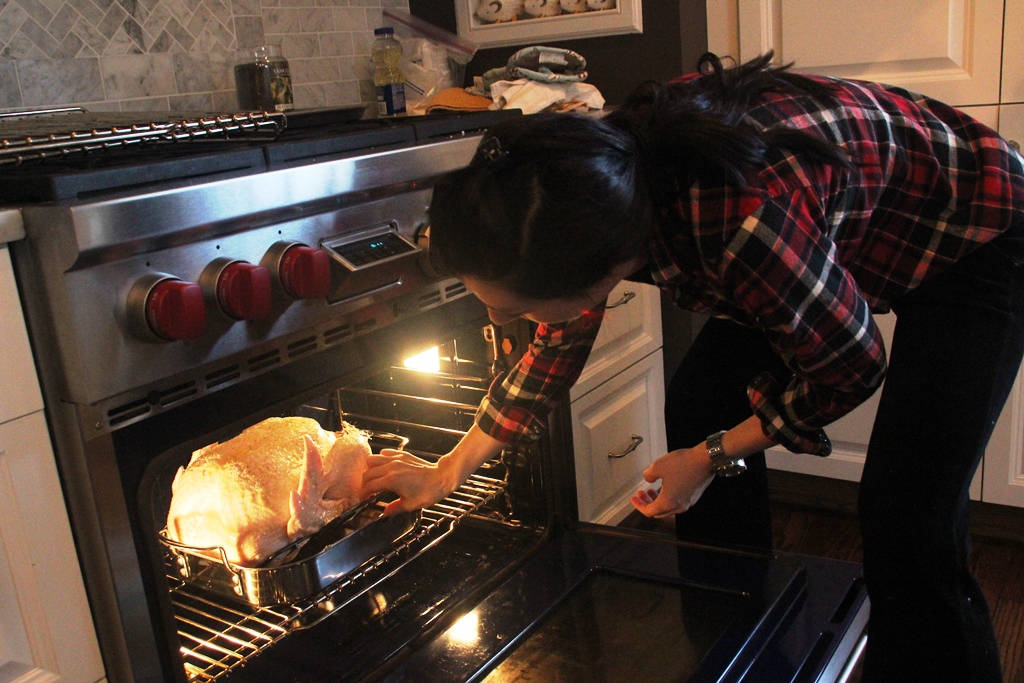
On Thanksgiving morning, I got up at 6 AM to get my 20lb turkey, Tyrone, into the oven.  He had been brining in the garage for the previous 24 hours to ensure his flavorful tenderness.  After several careful calculations, I heaved him up and out of his brining container and into the sink.

IMG_6337

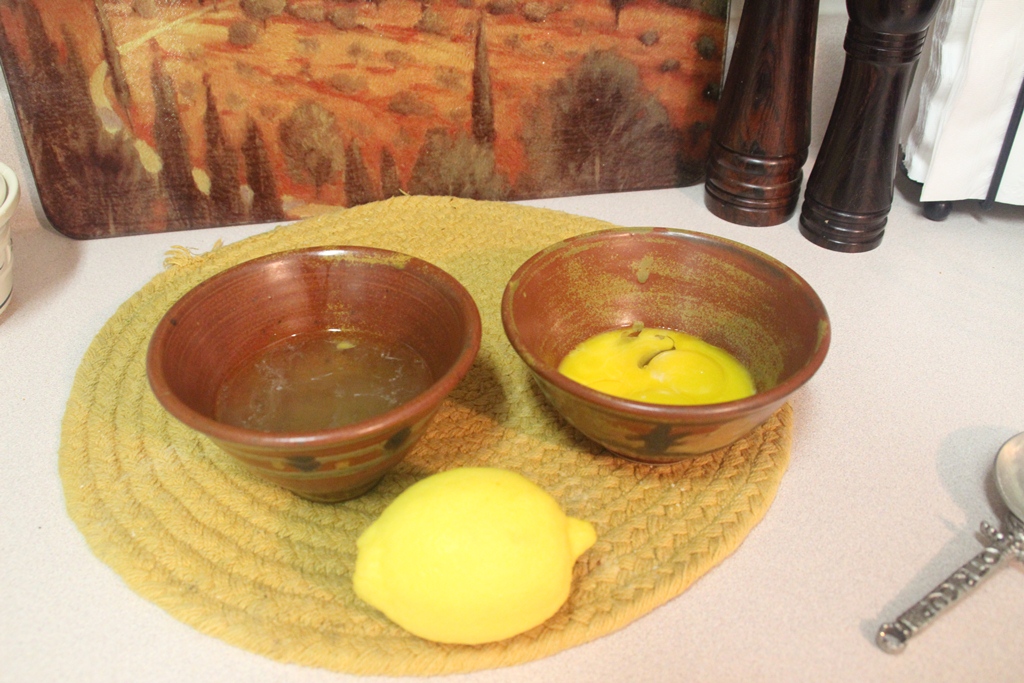
There is just nothing appetizing about a raw turkey.  Especially a raw turkey taking a bath in your kitchen sink.  FYI that’s a lemon from the brine, not a rubber ducky.

IMG_6341

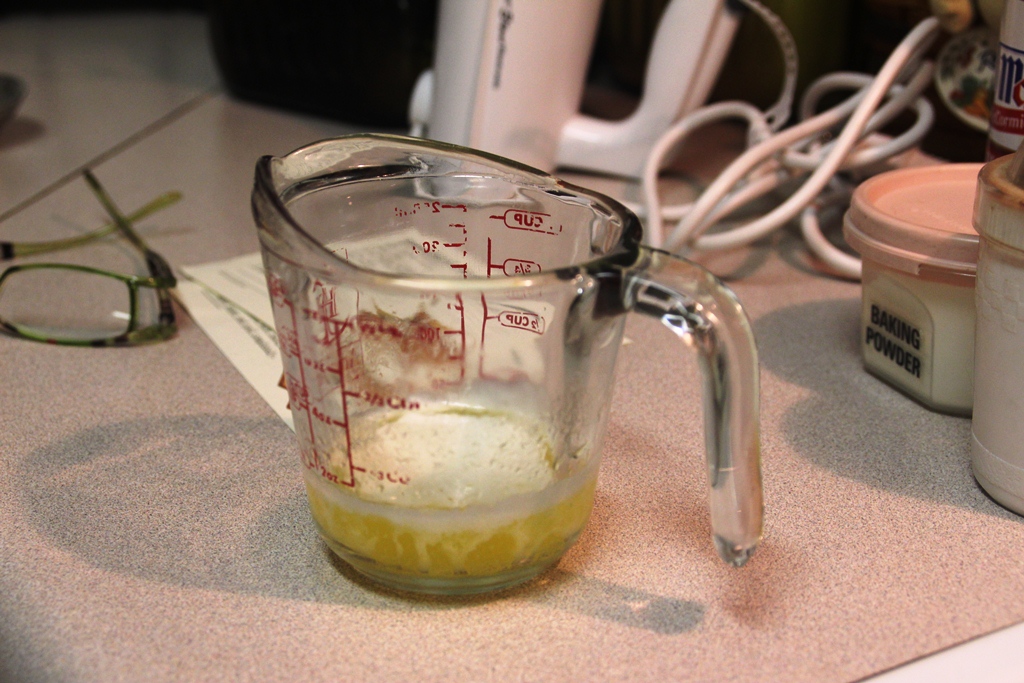
06:30: Judging by the mess, there was some serious cooking underway at this point.

IMG_6344

Here I am mentally preparing myself to lift Tyron and escort him to the tanning bed.

IMG_6347

A few last words. Bye bye, birdy.

IMG_6348

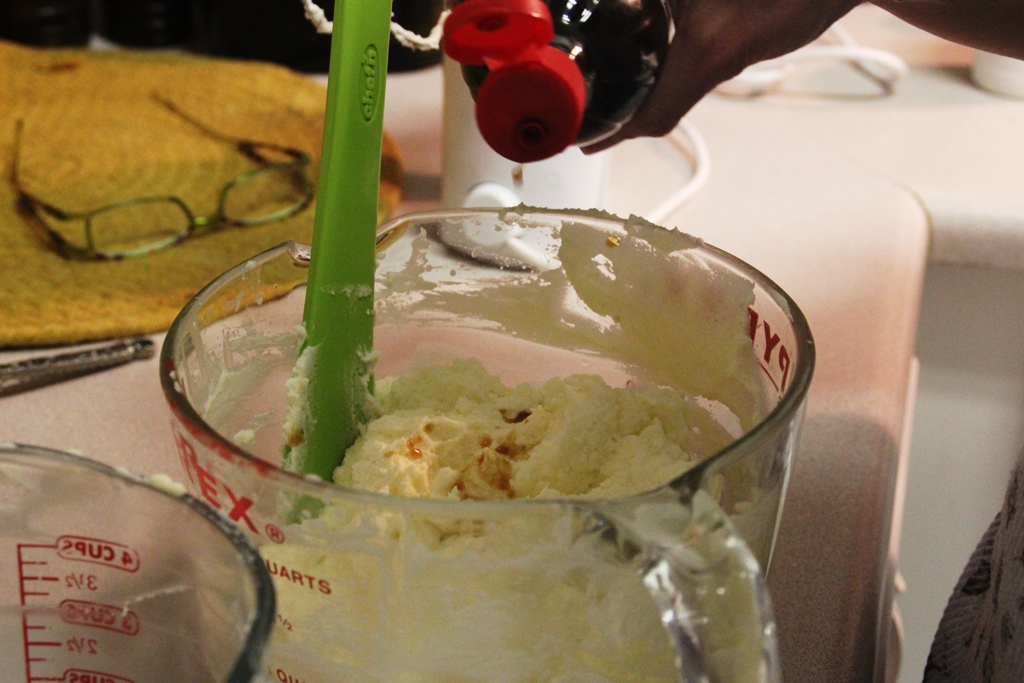
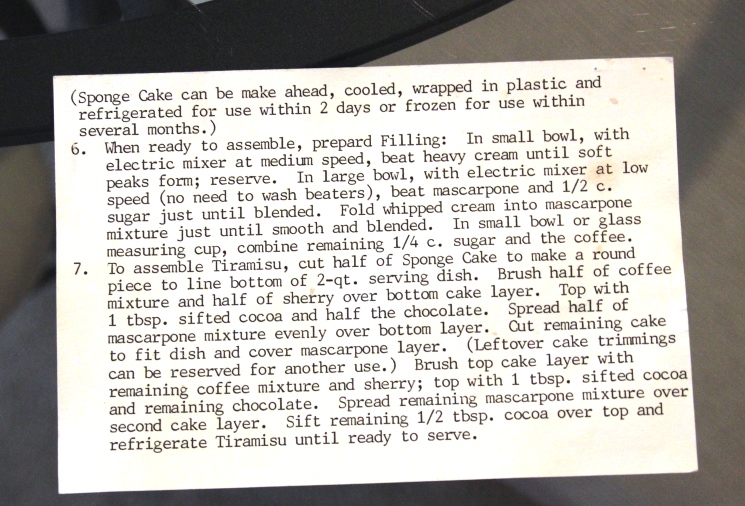
Next on the list was to make the desserts and eat my breakfast since it was likely only about 7:00 AM at this point.  Please note my “Oops! All Berries!”, the traditional thanksgiving breakfast cereal. As I noshed on my nutritious meal, I made brandy apple cake and derby pie.  Technically, it was bourbon apple cake because I didn’t have any brandy and bourbon seems to make most things taste better.  This wasn’t the last of the bourbon for the day, either.

IMG_6376

My mom had gotten me this beautiful cake pan that was featured on the cover of Southern Living a year or so ago.  I was anxious to see how cleanly the cake would come out of the pan and nervous that it might tear.

IMG_6382

But it slid right out and looked lovely!

IMG_6381

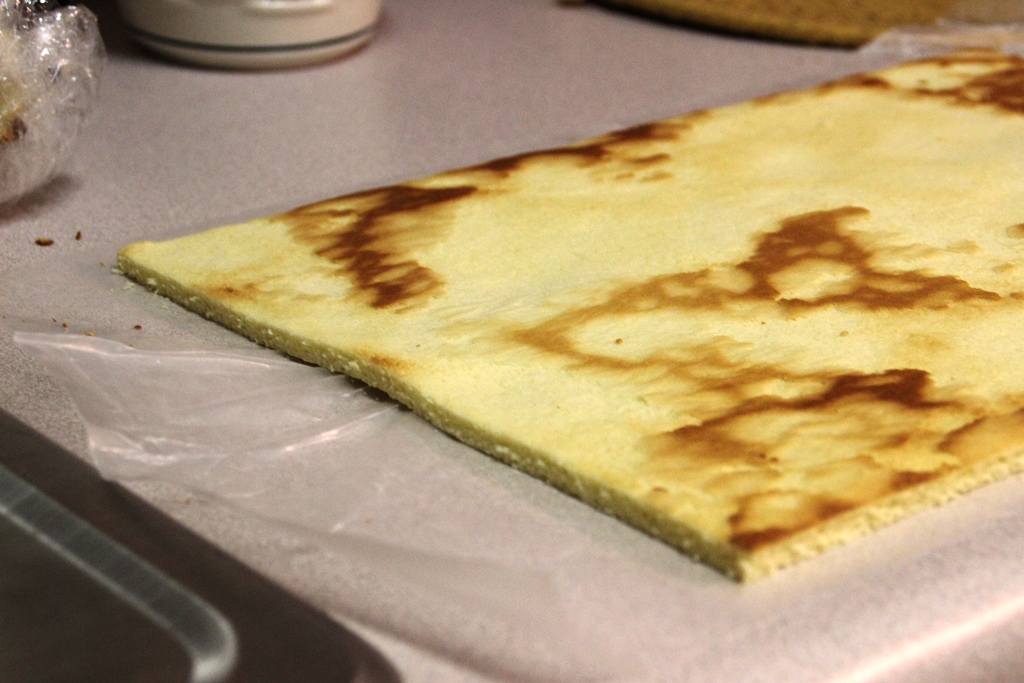
The pie looked good, but I overcooked it.  While the taste was alright, the pie was so sticky that it stuck to my teeth like tar.  This is why I make multiple desserts…with bourbon.

09:00: Princess Eugene arose around this time.

IMG_6378

Meanwhile, I continued to baste Tyrone every 30 minutes or so.  The previous owner of the home designed a lovely chef’s kitchen but only put in one oven.   Have you ever cooked Thanksgiving dinner in one oven and in one day?  Trying to juggle a 20lb turkey, a cake, a pie, dressing, sweet potatoes, roasted nuts, and popovers meant that Tyrone’s legs were a little underdone.

I promptly started measuring for an additional oven.

IMG_6391

Looking golden, Tyrone!

About this time, I was roasting some pecans for the salad.  Eugene walked in and asked if I was making popcorn.  I gave her a very confused look and then ran to the oven to pull out my nuts that were so far past roasted that they were as black as night and beginning to melt into the pan.  I took the pan outside and left it on the patio to get rid of the lovely smell.  When I went to get the pan the next day, the nuts had been left untouched.  They were even too far gone for the squirrels.

IMG_6410

Ahhhhhhhhhhh!

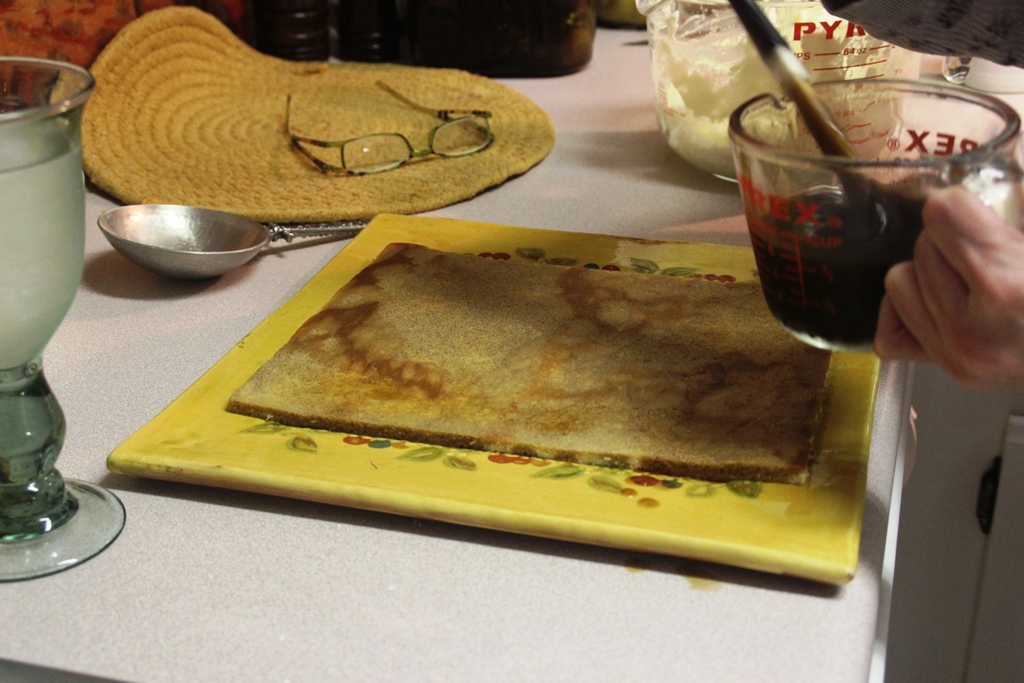
At this point we had used every piece of cutlery in the kitchen.  That is not an exaggeration.  Things got especially tight when it was time for dessert.

IMG_6413

My collection of serving utensils is lacking.  And by lacking I mean nearly nonexistent.

As my mom finished up the gravy, she asked what I would like to put it in.  In my imaginary gravy boat, of course!  I scrambled for something suitable and came up with this silver nut bowl that was Aunt Anna’s.  I think the soup ladle 4 times its size really completed the look.

IMG_6416

Though we had a few challenges along the way, we managed to produce a nice meal.  It was tasty, but not as spectacular as we had wanted so we started to make a plan for next year.  Here’s a sneak peak at the menu:  (If you’d like to come, please bring your own tailgating equipment.)

  • Fried corn! How did we forget this!!??? This is a thanksgiving staple
  • Roasted asparagus
  • Dressing patties
  • Root vegetable gratin
  • Bourbon bread pudding
  • Maybe just a turkey leg?

We’ll try to have the additional oven installed by then.  Maybe we’ll have a proper table and chairs, maybe not.

Merry Christmas Eve!

Y’all keep it tasty,

Sugarlump

Tackling Tiramisu

There are very few non-chocolate desserts that I will give the time of day.  My absolute favorite non-chocolate dessert is butterscotch brownies, which continue to baffle me with their non-chocolaty deliciousness.  There are some things that cannot be rationally explained and I believe this is one of them.  Next on my list of acceptable non-chocolate desserts is tiramisu, but only a handful that I have tasted in my life are up to snuff.  One absolute deal-breaker is any trace of almond.  In my opinion, it does not belong in tiramisu.

I tried to make tiramisu once before in my life.  It was not a success.  I went a little overboard on the coffee and put in about twice what the recipe called for because those lady fingers just didn’t look saturated enough as I was assembling the dessert.  The next day, my tiramisu was sitting in a puddle.  The taste wasn’t bad, but I definitely had a texture issue to work out.  Unfortunately, I had volunteered to make this dessert because my mom’s boss and his family were coming over for dinner.  They were sports and cleaned their plates.   It was on that fateful day that I learned firsthand the valuable lesson that one should never prepare an unfamiliar dish for the first time when company is coming over, particularly company you would like to remain in good standing with.  Instead, I would highly recommend preparing something that you have perfected.

My mother did not get fired in case you were wondering.

Since my tiramisu had knocked me down instead of picking me up, it was a while before I was emotionally ready to tackle it again.  My neighbor Anna is Italian and a wonderful cook and baker, so I decided it was safe to try to make tiramisu again with her.

I only allowed myself to measure the dry ingredients and did not deviate from the recipe in the slightest.

For the most part.

When Anna and I were discussing the ingredients for the dessert, I offered to pick up the lady fingers.  She informed me that that would not be necessary as we would be making the cake portion ourselves because it would be a better texture and flavor.  Boy was she right on about that.

This recipe is a long one, but it’s not difficult.  It originates from Southern Living magazine, circa 1988. Heregoes:

IMG_5077

Preheat the oven to 400 degrees and line a half-sheet pan with wax paper and then butter and flour the wax paper so the cake does not stick.

IMG_5078

Separate 4 eggs and let them come to room temperature.

IMG_5079

Melt 3 tablespoons of butter and let it cool.

IMG_5081

Brew some potent coffee and put 1 cup of it aside to cool. (I would recommend drinking the rest of it if you’re sleepy because this is going to take a while.)  Add ¼ cup of sugar and a miniature of Kahlua to the coffee.

IMG_5082

Sift together 1 cup of all-purpose flour, ¼ teaspoon of baking powder, and ¼ teaspoon of salt.

IMG_5083

In another bowl, beat together the egg yolks and ¾ cup of sugar until light and thick.  This will take about 5 minutes so I would recommend stretching beforehand if using a handheld mixer.

IMG_5085

It will look something like this when it’s ready.

IMG_5090

Then pour in 1 tablespoon of lemon juice, 1 tablespoon of water, and 1 teaspoon of ‘niller extract.

IMG_5091

I love vanilla extract.

IMG_5093

I also really like this nifty little gadget that allows one to dust cocoa powder on things.

Sorry, I got sidetracked by the idea of something chocolate.

IMG_5094

In yet another bowl, beat the egg whites on low speed until they are frothy and then add in ¼ cup of sugar.  Increase the speed of the mixer to medium and beat the egg whites until they are stiff but don’t overbeat.

IMG_5097

Add half of the egg white mixture and half of the flour mixture to the egg yolk mixture.  Fold the mixtures together until combined.  Repeat with the remaining half of the mixtures.

IMG_5099

Pour the batter onto the sheet pan.

IMG_5104

Spread the batter evenly across the sheet pan using a spatula.

IMG_5108

Then pop it in the oven for 15 or 20 minutes or until golden brown on top and the center springs back.

IMG_5109

Let it cool for a few minutes in the pan and then turn it out onto wax paper and let it cool completely.

IMG_5110

Carefully remove the wax paper from the bottom of the cake as that is not a texture you want in your tiramisu.

IMG_5112

Then, cut off the edges of the sponge cake so no one has to experience a crunchy/stiff bite of tiramisu. Remember, it’s all about texture.

IMG_5114

For the filling, beat 1 cup of heavy cream until it forms peaks.

IMG_5115

Then beat together ½ cup sugar and 1 pound of mascarpone cheese.

IMG_5119

Fold together the mascarpone mixture and the heavy cream.  If you’re feeling rebellious, add a few drops of vanilla extract into the mixture.  In my experience, a little extra vanilla extract never hurt anything.

It was Anna’s idea.

IMG_5120

Next, cut the cake in half and place one half on a serving dish.

IMG_5122

Brush half of the coffee mixture onto the cake using a pastry brush.

IMG_5123

It should look something like this.

IMG_5124

Dust the cake generously with cocoa powder.

IMG_5126

Then sprinkle on some chocolate shavings.

IMG_5127

Spread half of the filling mixture over the first layer of cake.

IMG_5129

Easier said than done. Don’t be alarmed if some of the chocolate shavings get mixed in.  No one will ever know and it will still taste good.

IMG_5130

Repeat this process with the second layer of cake and filling.

IMG_5132

Coffee mixture…

Cocoa powder and chocolate shavings.

Filling…

IMG_5136

Some more cocoa powder…

IMG_5138

Smooth the sides with a knife.

IMG_5140

Decorate the top with dark and white chocolate shavings.

Then let the cake sit overnight in the refrigerator and enjoy the next day (preferably not with your mom’s boss unless this is at least the second time you’re making this recipe).

Here are the recipe cards:

IMG_5143

IMG_5142

IMG_5141

IMG_5144

(We deviated from the recipe a little bit by adding Kahlua instead of sherry or Marsala.  Don’t tell anyone.)

Y’all hurry back,

Sugarlump

Peanut Butter Chocolate Chip Cookies

I once had a peanut butter chocolate chip cookie at a local restaurant in the town I grew up in.

It changed my life forever.

After that day, it became my mission to perfect a peanut butter chocolate chip cookie recipe.

It took many a flop for me to get to where I am today.  I tried several recipes I found online and none was peanut-buttery enough.  So I tinkered with this and that and I think I’ve got a good thing going.   The trick is to put in A LOT of peanut butter.  Shocking, I know.  Also, take the cookies out of the oven before they look done.  I mean it. If you leave them in there until they look done, they will turn into bricks.  And no one likes to eat peanut butter chocolate chip bricks.

If you want to become instantly popular among your younger sister’s high school pals, I would suggest making these cookies.  After I made the cookies for the youngsters the first time, I was hit up for a double batch almost every time they came over.  I nearly broke my mixer once when I received a triple batch request.

There were never any cookies left by the time Eugene’s friends went home.

Here’s how to become instantly popular among your sister’s friends:

Assemble butter, peanut butter, sugar, light brown sugar, eggs, all-purpose flour, baking soda, baking powder, salt, and chocolate chips but NOT vanilla extract.  I don’t know what that was doing there.

Ingredients (recap):

1)      1 stick of unsalted butter, softened

2)      ¾ cup of peanut butter

3)      1/3 cup of light brown sugar

4)      2/3 cup of sugar

5)      1 egg

6)      1 ¼ cup all-purpose flour

7)      ½ teaspoon baking powder

8)      ½ teaspoon baking soda

9)      ¼ teaspoon salt

10)   1 cup chocolate chips (preferably 60% bittersweet)

Directions:

Preheat oven to 375 degrees.

Measure out the first 4 ingredients and throw them into a mixing bowl.

I would highly recommend spraying your measuring cup with cooking spray to help that peanut butter slide right into the bowl.  Keep a spatula handy in case the peanut butter gets pesky.

Cream the butter, peanut butter and white and brown sugars until light in color.

Add the egg and mix until incorporated.

Sift together flour, baking powder, baking soda and salt.  Add dry mixture to wet mixture and mix until just combined.

Stir in chocolate chips by hand.  I would have taken a picture but I was stirring.

Drop the dough onto a baking sheet using a large spring-loaded cookie/ice-cream scoop for even cookies.  Press down to flatten the cookies to ¾” thick.  The cookies should be about 3″ in diameter.  If you only have a medium size cookie/ice-cream scoop like the one pictured above, your cookies will be about 2″ in diameter.    Press any straggler dough into the sides of the cookies so they look prettier and more uniform when they come out of the oven.

Bake for 8-12 minutes (depending on your scoop size) or until just barely starting to brown.  The cookies will look underdone.  Let the cookies cool for 5 minutes on baking sheet and then serve or finish cooling them on wire rack.

I tidied up the edges of the dough for the cookies on the left and neglected to do so for the batch on the right.  The ones on the left are much more attractive.   However, I over-baked the cookies on the left and the ones on the right were just right.  You really have the watch these suckers.  The MOMENT you see just a hint of brown on the cookies, remove them from the oven to cool IMMEDIATELY.

I mean it.

You’ll thank me.

Y’all eat up,

Sugarlump