There are very few non-chocolate desserts that I will give the time of day. My absolute favorite non-chocolate dessert is butterscotch brownies, which continue to baffle me with their non-chocolaty deliciousness. There are some things that cannot be rationally explained and I believe this is one of them. Next on my list of acceptable non-chocolate desserts is tiramisu, but only a handful that I have tasted in my life are up to snuff. One absolute deal-breaker is any trace of almond. In my opinion, it does not belong in tiramisu.
I tried to make tiramisu once before in my life. It was not a success. I went a little overboard on the coffee and put in about twice what the recipe called for because those lady fingers just didn’t look saturated enough as I was assembling the dessert. The next day, my tiramisu was sitting in a puddle. The taste wasn’t bad, but I definitely had a texture issue to work out. Unfortunately, I had volunteered to make this dessert because my mom’s boss and his family were coming over for dinner. They were sports and cleaned their plates. It was on that fateful day that I learned firsthand the valuable lesson that one should never prepare an unfamiliar dish for the first time when company is coming over, particularly company you would like to remain in good standing with. Instead, I would highly recommend preparing something that you have perfected.
My mother did not get fired in case you were wondering.
Since my tiramisu had knocked me down instead of picking me up, it was a while before I was emotionally ready to tackle it again. My neighbor Anna is Italian and a wonderful cook and baker, so I decided it was safe to try to make tiramisu again with her.
I only allowed myself to measure the dry ingredients and did not deviate from the recipe in the slightest.
For the most part.
When Anna and I were discussing the ingredients for the dessert, I offered to pick up the lady fingers. She informed me that that would not be necessary as we would be making the cake portion ourselves because it would be a better texture and flavor. Boy was she right on about that.
This recipe is a long one, but it’s not difficult. It originates from Southern Living magazine, circa 1988. Heregoes:

Preheat the oven to 400 degrees and line a half-sheet pan with wax paper and then butter and flour the wax paper so the cake does not stick.

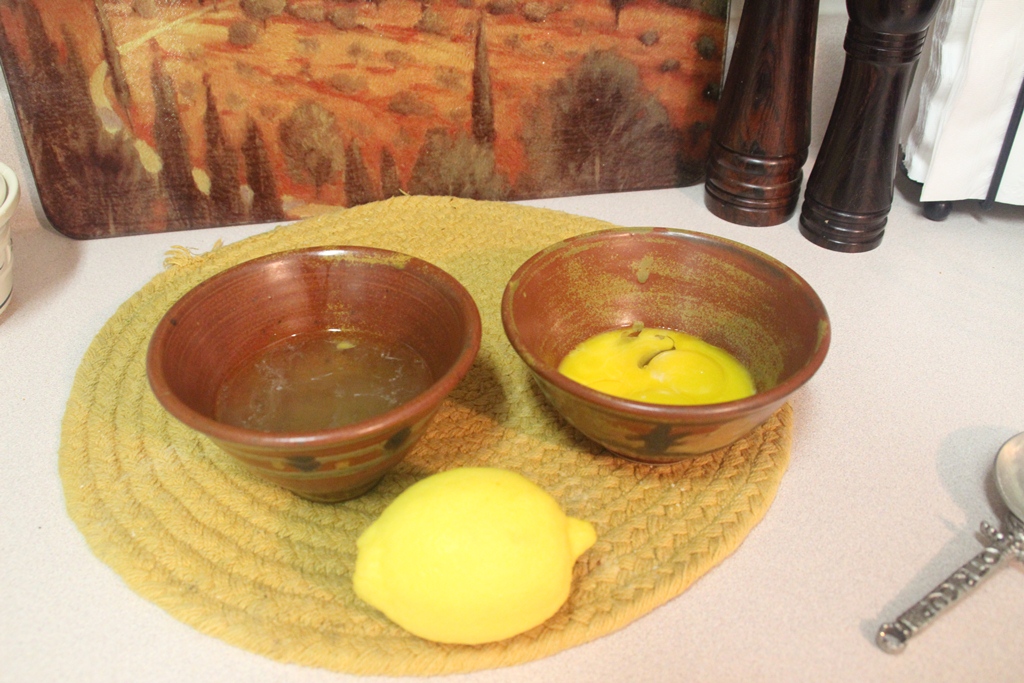
Separate 4 eggs and let them come to room temperature.

Melt 3 tablespoons of butter and let it cool.

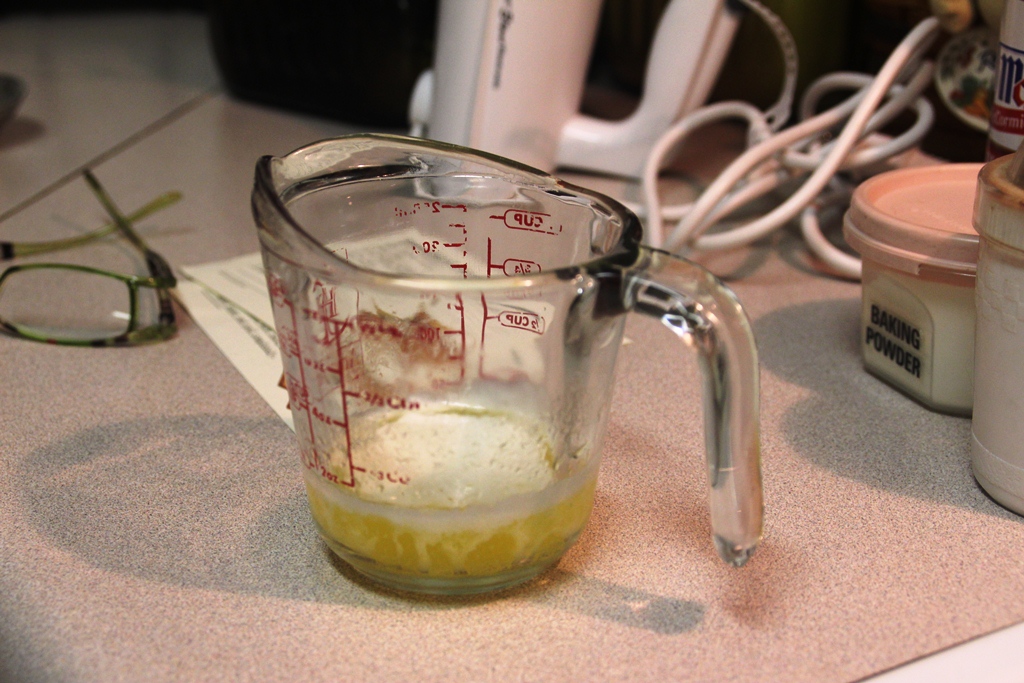
Brew some potent coffee and put 1 cup of it aside to cool. (I would recommend drinking the rest of it if you’re sleepy because this is going to take a while.) Add ¼ cup of sugar and a miniature of Kahlua to the coffee.

Sift together 1 cup of all-purpose flour, ¼ teaspoon of baking powder, and ¼ teaspoon of salt.

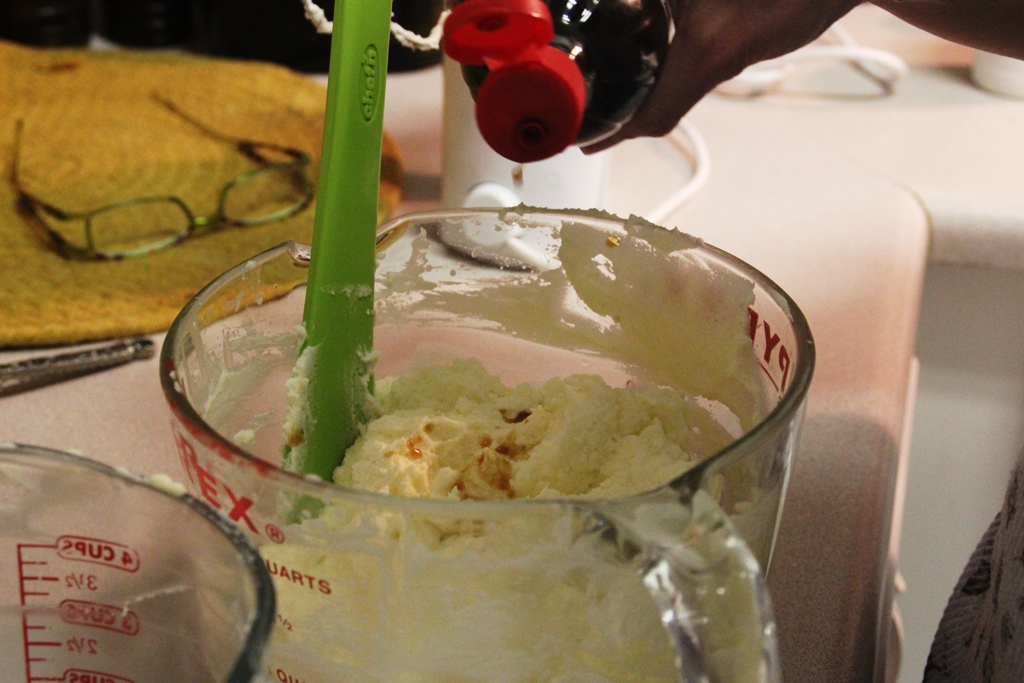
In another bowl, beat together the egg yolks and ¾ cup of sugar until light and thick. This will take about 5 minutes so I would recommend stretching beforehand if using a handheld mixer.

It will look something like this when it’s ready.

Then pour in 1 tablespoon of lemon juice, 1 tablespoon of water, and 1 teaspoon of ‘niller extract.

I love vanilla extract.

I also really like this nifty little gadget that allows one to dust cocoa powder on things.
Sorry, I got sidetracked by the idea of something chocolate.

In yet another bowl, beat the egg whites on low speed until they are frothy and then add in ¼ cup of sugar. Increase the speed of the mixer to medium and beat the egg whites until they are stiff but don’t overbeat.

Add half of the egg white mixture and half of the flour mixture to the egg yolk mixture. Fold the mixtures together until combined. Repeat with the remaining half of the mixtures.

Pour the batter onto the sheet pan.

Spread the batter evenly across the sheet pan using a spatula.

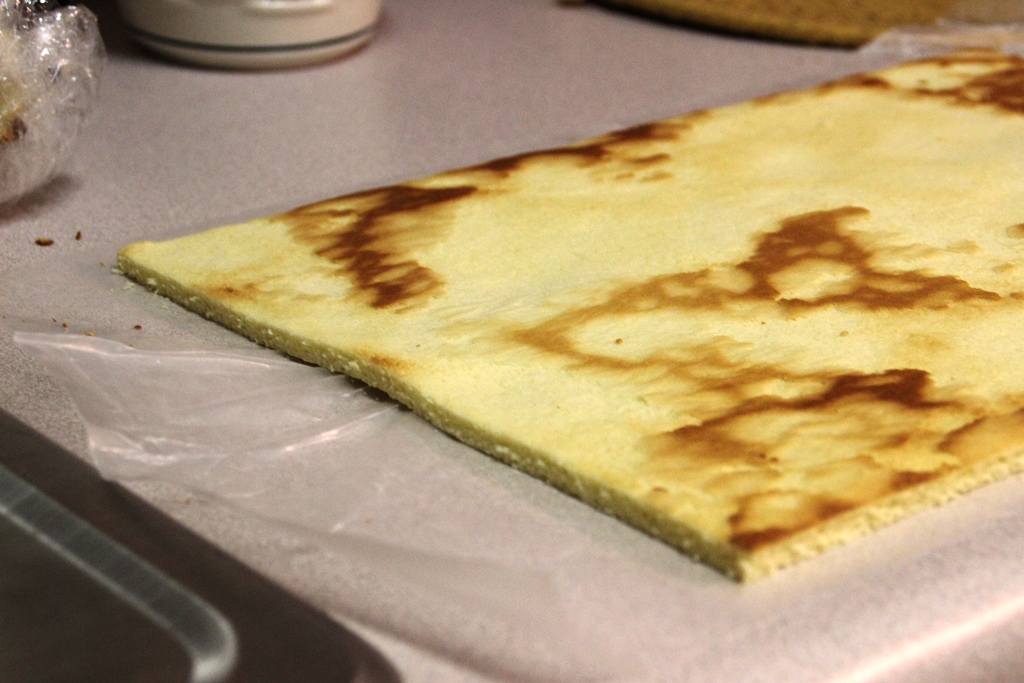
Then pop it in the oven for 15 or 20 minutes or until golden brown on top and the center springs back.

Let it cool for a few minutes in the pan and then turn it out onto wax paper and let it cool completely.

Carefully remove the wax paper from the bottom of the cake as that is not a texture you want in your tiramisu.

Then, cut off the edges of the sponge cake so no one has to experience a crunchy/stiff bite of tiramisu. Remember, it’s all about texture.

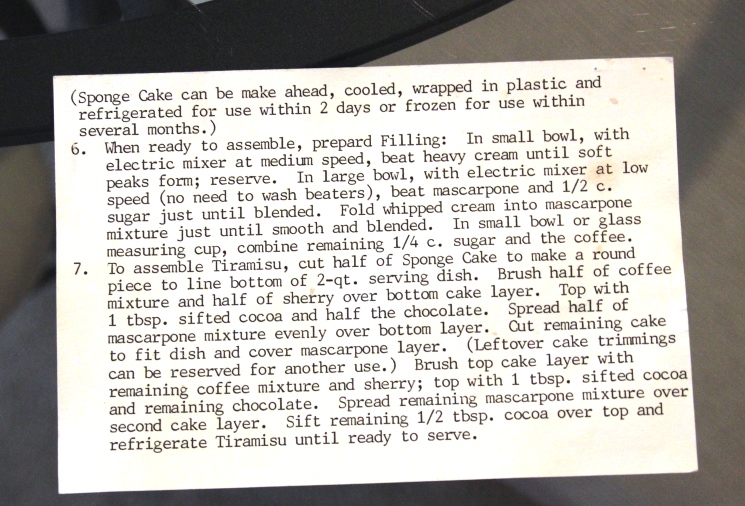
For the filling, beat 1 cup of heavy cream until it forms peaks.

Then beat together ½ cup sugar and 1 pound of mascarpone cheese.

Fold together the mascarpone mixture and the heavy cream. If you’re feeling rebellious, add a few drops of vanilla extract into the mixture. In my experience, a little extra vanilla extract never hurt anything.
It was Anna’s idea.

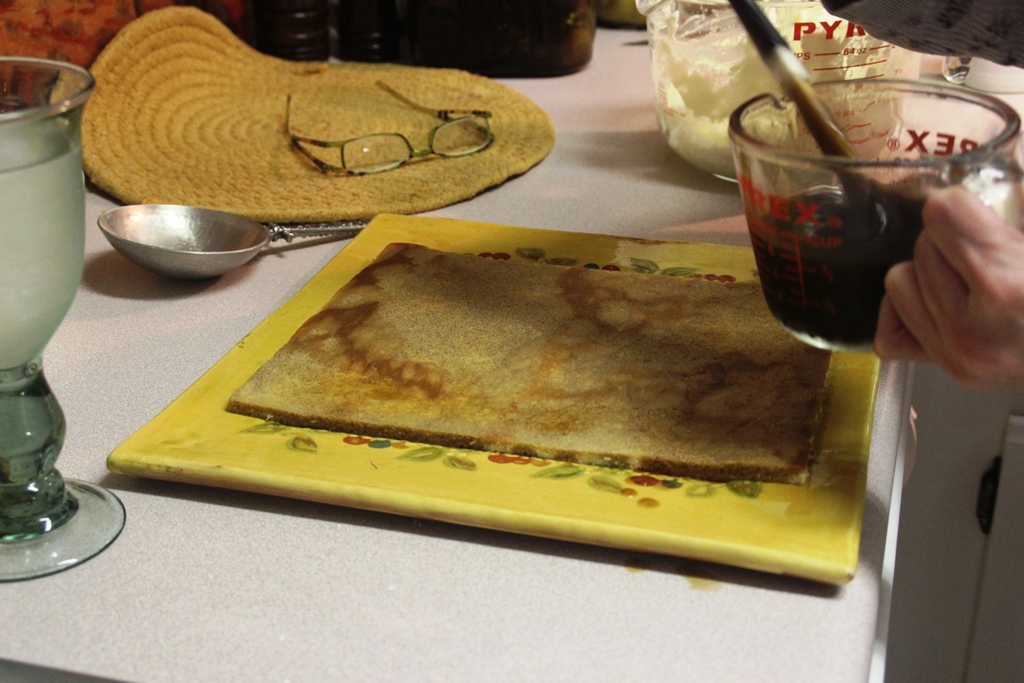
Next, cut the cake in half and place one half on a serving dish.

Brush half of the coffee mixture onto the cake using a pastry brush.

It should look something like this.

Dust the cake generously with cocoa powder.

Then sprinkle on some chocolate shavings.

Spread half of the filling mixture over the first layer of cake.

Easier said than done. Don’t be alarmed if some of the chocolate shavings get mixed in. No one will ever know and it will still taste good.

Repeat this process with the second layer of cake and filling.

Coffee mixture…
Cocoa powder and chocolate shavings.
Filling…

Some more cocoa powder…

Smooth the sides with a knife.

Decorate the top with dark and white chocolate shavings.
Then let the cake sit overnight in the refrigerator and enjoy the next day (preferably not with your mom’s boss unless this is at least the second time you’re making this recipe).
Here are the recipe cards:


(We deviated from the recipe a little bit by adding Kahlua instead of sherry or Marsala. Don’t tell anyone.)
Y’all hurry back,
Sugarlump